Last updated: 2026-08-10 · By Abdul Razzaq · ~14-min read
TL;DR — A clean Figma to Shopify build depends on the handoff, not the code. Ship it with Dev Mode enabled, tokens named, and frames mapped to Shopify sections and blocks. Then build with lean Liquid, a Vite pipeline, responsive image srcsets, and
font-display: swapso the theme lands inside Google’s Core Web Vitals thresholds on launch day.
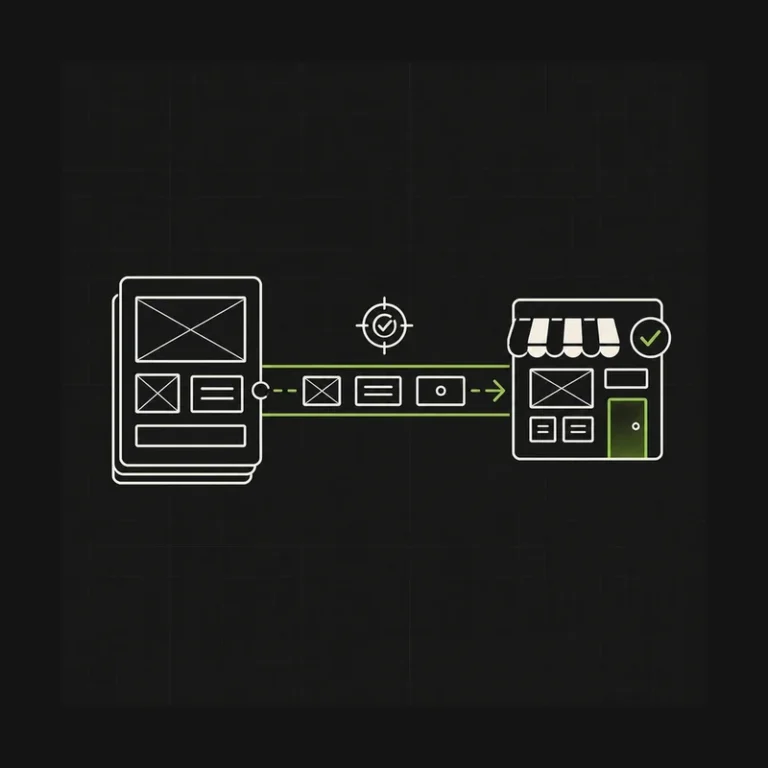
Across the Figma-to-Shopify builds I’ve shipped in the last 12 months, the pattern is consistent: the code is rarely the reason a project stalls. The handoff is. A designer sends over a beautiful file with unnamed layers, no tokens, three redlined breakpoints, and one lonely mobile frame, and the developer spends the first week re-drawing the design in their head before writing a line of Liquid. The Javson Sports build, a Figma to Shopify project with a full B2B wholesale portal on top, hit 92 mobile PageSpeed at launch. That number did not come from a magic build tool. It came from a Figma file that had been prepared like a spec, not a pitch deck.
This playbook is the exact handoff I ask for on every Figma to Shopify project and the workflow I run once the file lands in Dev Mode. It cites Google’s Web Vitals thresholds for the performance bar, Shopify’s theme architecture docs for how sections and blocks actually work, and Figma’s Dev Mode for the handoff surface. If you’re a founder, a designer, or a developer inheriting one of these files, this is what “ready to ship” looks like before code starts.
What a Shopify developer actually needs from your Figma file
The direct answer: ten things. Design tokens, a component library, responsive breakpoint frames, Dev Mode turned on, section-based layer naming, exported image assets, documented font licenses, interaction specs, CMS-editable annotations, and accessibility contrast noted. Miss any of these and the developer spends billable hours reverse-engineering intent instead of building.
Here’s the checklist I send back to every designer before I quote a Figma-to-Shopify project:
- Design tokens as named styles. Color, type, spacing, radius, and shadow published as library styles. Loose hex values inside frames become fragile CSS the moment a brand refresh lands.
- Component library, not one-off frames. Header, footer, product card, cart drawer, form fields, buttons, and section headers should each be a component with variants for hover, focus, disabled, and loading. Instances everywhere else.
- Three breakpoint frames minimum. Mobile 375, tablet 768, and desktop 1440 at least. Ideally a wide 1920 frame too if the design fills viewports. Anything narrower than three breakpoints is a desktop mockup pretending to be a design system.
- Dev Mode turned on. Figma Dev Mode exposes CSS values, measurements, exportable assets, and code-ready specs that developers can inspect without owning an editor seat. It is the single biggest handoff accelerator Figma has shipped.
- Section-based layer naming. Layers named for the Shopify section they will become:
section/hero,section/featured-collection,section/press-logos,block/product-card. This is how a developer builds a mapping table in five minutes instead of five hours. - All image assets exported and linked. Hero images at 2x, product placeholders, icons as SVG, favicons and social share cards. If it appears in the design, it needs to appear in an exported asset folder.
- Font licenses documented. Named foundry, weights in use, and self-hosting rights confirmed. Google Fonts is the fastest path. Adobe Fonts requires a valid Fonts subscription tied to the domain. Custom foundries need per-domain licenses you can prove on audit.
- Interaction specs written down. Hover states, form validation behavior, cart drawer transitions, and any scroll-triggered motion. Prototype connections are a start; a paragraph next to the frame is what gets built correctly the first time.
- CMS-editable annotations. For every text field, image, and CTA, mark whether the merchant can edit it in the Shopify theme editor. This is what determines whether a piece of copy becomes a section setting or a hard-coded string in Liquid.
- Accessibility contrast noted. Every text-on-background pair checked at WCAG AA minimum. Neon-on-charcoal looks great in Figma and fails a real audit on the light hover state nobody thought about.
On the Javson Sports build, the design file had eight of these ten out of the gate. The two we had to rebuild together, CMS-editable annotations and accessibility notes, added a week of upfront work and probably saved three weeks of post-launch rework.
The Figma-to-Shopify workflow that actually works
The direct answer: nine phases from file handoff to launch. Audit, component inventory, section mapping, Liquid scaffold, Vite build for CSS and JS, section-level QA, PageSpeed pass, client acceptance, and launch. Each phase gates the next, so skipping the audit to save two days always costs a week later when the section mapping falls apart.
The diagram below is the exact procedure I walk every Figma-to-Shopify project through. It works for a five-section landing page and it works for a hundred-template B2B storefront. The only thing that scales is the time each phase eats, not the sequence.
flowchart TD
Start(["Figma file
received in Dev Mode"]) --> Audit(["Phase 1
Handoff audit"])
Audit --> Inventory(["Phase 2
Component inventory"])
Inventory --> Mapping(["Phase 3
Section and block mapping"])
Mapping --> Scaffold(["Phase 4
Liquid scaffold
+ schema"])
Scaffold --> Build(["Phase 5
Vite CSS and JS build"])
Build --> QA(["Phase 6
Section-level QA"])
QA --> Perf{"PageSpeed
90+ on mobile?"}
Perf -->|No| Fix(["Fix images, fonts,
lazy-load, defer JS"])
Fix --> Perf
Perf -->|Yes| Accept(["Phase 8
Client acceptance"])
Accept --> Launch(["Phase 9
Launch
+ 30-day watch"])
classDef step fill:#0e1218,stroke:#00d9a3,stroke-width:1px,color:#e8ecef
classDef decision fill:#1a1f2b,stroke:#f5a742,stroke-width:1px,color:#e8ecef
classDef good fill:#0f2818,stroke:#7dd88a,stroke-width:1.5px,color:#e8ecef
classDef bad fill:#281818,stroke:#f28080,stroke-width:1.5px,color:#e8ecef
class Start step
class Audit,Inventory,Mapping,Scaffold,Build,QA step
class Perf decision
class Accept,Launch good
class Fix bad
Three things about the workflow are worth calling out.
First, the handoff audit is a paid phase, not a free discovery call. It usually takes half a day and produces a written report of what is production-ready in the Figma file and what needs to be resolved before code starts. Skipping it is the single biggest predictor of a Figma-to-Shopify project going over budget.
Second, the Vite build phase is not optional for a modern Shopify theme. The Shopify performance best-practices docs push toward small critical CSS, deferred JS, and lazy-loaded below-the-fold assets. A bundler like Vite or esbuild is how you get there predictably. Hand-writing tags into theme.liquid and hoping for the best is a 2018 workflow.
Third, the PageSpeed gate is a real gate. If the theme does not clear a mobile score of 90 in Google PageSpeed Insights on the templates that matter, the phase does not close. I do not send acceptance requests to clients on 78-scoring themes and then promise to "optimize post-launch." That's how technical debt gets sold as a feature.
Mapping Figma components to Shopify sections and blocks
The direct answer: Figma's containment model maps almost one-to-one onto Shopify's section-and-block architecture, if you name things right. Frames become sections, auto-layout children become blocks, component instances become snippet renders, variants become schema settings, and design tokens become CSS custom properties. Get the mapping table on paper before you write Liquid.
Here is the mapping I hand to every Figma-to-Shopify developer before they touch the theme:
| Figma concept | Shopify concept | Where it lives in the theme | Notes |
|---|---|---|---|
| Top-level frame | Section | sections/*.liquid |
Each editorial section becomes one Liquid section with its own schema. |
| Auto-layout child | Section block | blocks array in section schema |
Repeatable, sortable in the theme editor. |
| Component instance | Snippet render | snippets/*.liquid via {% render %} |
Component boundaries in Figma match snippet boundaries in Liquid. |
| Component variant | Block-level setting | settings in the block schema |
Variant swap becomes a setting toggle for merchants. |
| Named color / type style | CSS custom property | :root {} in resources/styles/app.css |
Design tokens as CSS variables scale far better than baked-in Tailwind classes. |
| Prototype interaction | Alpine.js or vanilla JS behavior | resources/scripts/*.js bundled via Vite |
Motion specs from the file translate into scoped JS with clear enter/leave states. |
| Layout grid | Container width + gap tokens | Section wrapper class | 12-column Figma grids collapse to a max-width container with CSS grid inside. |
| Constraints (pin, resize) | Responsive CSS | Section CSS scoped to the section handle | Constraints in Figma are a hint, not a spec. Real breakpoints come from the frames. |
The mismatch that trips most developers up is variants. In Figma, a variant is a stateful component. In Shopify, a variant of a block usually becomes a type: "select" or type: "checkbox" setting in the schema, not a separate block type. If your hero has "left-aligned," "centered," and "right-aligned" variants, that is one block type with an alignment setting, not three block types. Get that call wrong and every future edit becomes an ordeal for the merchant.
The other trap is treating design tokens as decoration. A color style named bg/accent in Figma should become --color-bg-accent in CSS, not bg-emerald-400. When the brand palette shifts six months from now, the CSS variable changes in one file. The Tailwind class changes in forty. This is the single mapping decision that determines whether the theme ages gracefully.
Finally, decide up front which parts of the design are structural and which are editorial. Structural parts, the layout skeleton, the header, the footer, sit inside theme.liquid or global sections. Editorial parts, everything the merchant will want to reorder or swap, live inside dynamic sections that appear in the theme editor. The Shopify theme architecture docs explain the sections and blocks model in full; the mapping table above is the shorthand I use to translate it into Figma vocabulary.
The performance layer, how to keep 90+ PageSpeed on custom builds
The direct answer: hitting 90+ PageSpeed on a Figma-to-Shopify custom theme comes from four disciplines. Modern image formats with responsive srcset, font loading with font-display: swap, critical CSS inlined and the rest deferred, and JavaScript that ships lazy by default. Miss any one and the score falls into the 70s.
Google's Core Web Vitals thresholds define what "good" means on real devices. To pass, a page needs LCP under 2.5 seconds, CLS under 0.1, and INP under 200ms at the 75th percentile of visits. Every optimization on a Shopify theme laddering up to those three numbers is worth doing. Everything else is decoration.
Images. WebP images are around 25-35% smaller than JPEG at equivalent quality, per the web.dev guidance. Shopify's CDN serves WebP and AVIF automatically when you use image_url with a target width, and the tag should always ship with width, height, loading="lazy" for below-the-fold images, and a proper srcset for the sizes actually used. The hero image is the one exception: it should be eager-loaded, priority-hinted, and dialed to the smallest possible file that hits the design bar. On Javson Sports, the hero WebP came in at 68KB after four rounds of compression against a design mock that started at 480KB.
Fonts. Every custom font declaration should ship with font-display: swap so text renders in the fallback immediately and swaps in the custom face when it arrives. The default of font-display: block blocks text for up to three seconds and torpedoes both LCP and CLS. Preload the two or three weights actually used above the fold with and skip the rest.
Critical CSS. Inline the styles needed for the first viewport into the and defer the rest. On a Sage-plus-Vite Shopify theme, this is one of the last polishing steps because it depends on the final DOM, not on the design file. Tools like critters or a Vite plugin handle the extraction. The reward is an LCP that lands under two seconds on mid-tier Android on cable throttling.
JavaScript. Ship it lazy. Cart drawer, product-page swatches, and lightbox scripts should hydrate on interaction, not on page load. Third-party scripts (analytics, chat widgets, review platforms) go behind defer, load after the LCP element, and get audited quarterly. The Javson Sports 92 mobile score came apart the first time we added a review-widget snippet that shipped 180KB of blocking JS. We swapped it for a lazier alternative and the score came back inside a day.
The Shopify performance best-practices guide codifies most of this and is worth reading end-to-end before you scaffold a custom theme. Then run PageSpeed Insights on every template that matters (home, collection, product, cart), not just the home page. Home-only optimization is how themes ship at 92 on the home template and 61 on the product page.
Where Figma-to-Shopify projects go sideways (and how to prevent it)
The contrarian take: most Figma-to-Shopify projects fail before code starts, not during it. And most of the failures trace back to the designer and the developer never being in the same conversation during the handoff. The file gets thrown over a wall, the developer builds what they see, and the design review three weeks in surfaces expectations that were never written down.
Here are the five patterns I see most often on rescue projects:
- The desktop-only Figma file. Three artboards, all 1440-wide, no mobile frames. The developer invents the mobile design during build, the designer is unhappy at review, and everyone spends the last week of the project retrofitting a responsive strategy that should have been baked into the file.
- The component-less file. Every card is a group. Every button is a fresh rectangle with a fresh text layer. The design "works" visually but has no reusability model. When the developer builds real Shopify components with a schema, the theme ships with cleaner logic than the Figma file it came from, and the designer feels like the code diverged from the design.
- The plugin-generated Liquid dump. A well-intentioned founder ran the Figma file through a Figma-to-Shopify plugin, uploaded the output as a theme, and hired a developer to "just clean it up." The output is 8,000 lines of nested divs, hardcoded copy, no schema, and no way to edit anything in the theme editor. Cleaning up is a euphemism for rebuilding.
- The image-heavy design that ignores performance. Full-bleed hero videos, four autoplaying product carousels above the fold, and 12MB of imagery on the home template. The design review passes. The mobile PageSpeed score is 41. The commercial impact shows up in the bounce rate two weeks after launch.
- The CMS-blind design. Beautiful editorial layouts where the copy fits the frame exactly. The merchant tries to change the headline post-launch, the copy overflows, the layout breaks, and now the theme needs a hotfix. Designs that don't account for content flexibility become designs the merchant can never touch.
The prevention is a paid handoff audit before quoting the build. Half a day, a written report, a meeting with the designer to resolve the top three risks. It costs about the same as one senior developer day, and it is the single highest-ROI hour on the timeline.
Plugin path vs custom Liquid, which route when
The direct answer: use a Figma-to-Shopify plugin for prototypes, campaign pages, and short-term landing pages where nobody will inherit the code. Use custom Liquid for anything you want to still be maintaining twelve months from now. The plugins are useful tools; they are not a substitute for a theme built by someone who can read the schema they're writing.
| Use case | Plugin path (Locofy, Anima, etc.) | Custom Liquid build |
|---|---|---|
| Prototype for a client pitch | Yes | Overkill |
| One-off campaign landing page (2-week lifespan) | Yes | Overkill |
| Static About / Contact page | Acceptable | Recommended |
| Home page with dynamic content and merchant-editable sections | No | Yes |
| Product template with variant logic, metafields, and swatches | No | Yes |
| Custom checkout, cart drawer, or B2B portal | Absolutely no | Yes |
| Full storefront the merchant will edit weekly | No | Yes |
The reason plugins fall short on production themes is the same reason they demo so well. They flatten a design into HTML and CSS that looks right on the initial view. What they cannot generate is Shopify-native section schema, block-level settings, dynamic Liquid loops over products or metafields, snippet architecture, or the eventing model that ties a cart drawer to the storefront API. Those are the parts of a Shopify theme that make it a Shopify theme instead of a static site with a checkout URL pasted on.
I have inherited plugin-generated themes twice. Both times the honest answer to the client was: this is going to be faster to rebuild than to salvage. The visual output was fine; the underlying architecture was unshippable. Use plugins where they save time on genuinely disposable work, and reach for custom Shopify theme development the moment the theme needs to live longer than the current campaign.
When to hire a Shopify developer vs run it in-house
The direct answer: hire a specialist unless you already have a senior Shopify developer on staff with Liquid, schema, and Vite experience. Front-end generalists can build a static site from a Figma file. Building a maintainable Shopify theme with clean sections, working schema, and 90+ PageSpeed is a narrower discipline.
| Situation | Run in-house | Hire a Shopify developer |
|---|---|---|
| Existing senior Shopify dev with Liquid and Vite experience | Yes | Optional |
| Front-end dev, no prior Shopify Liquid work | No | Recommended |
| Design-heavy custom theme with 10+ sections | No | Yes |
| B2B portal, custom checkout, or Plus-tier features | No | Yes |
| Design-to-launch under 6 weeks | No | Yes |
| Team of two designers and zero backend developers | No | Yes |
If you're evaluating who to hire, the Shopify developer vetting playbook covers the specific questions that separate a generalist from a Figma-to-Shopify specialist. The short version: ask for two Figma-to-Shopify projects with links, screenshots of the Figma file and the shipped theme side by side, and current mobile PageSpeed scores on the product template (not the home page). Everything else is signalling.
Frequently asked questions about Figma to Shopify
Can I convert my Figma design directly to Shopify with a plugin?
Technically yes, meaningfully no. Plugins like Locofy and Anima generate HTML and CSS that renders the visual design, but they do not produce Shopify-native section schema, block settings, or the Liquid loops that make a theme editable in the Shopify admin. Use plugins for prototypes and disposable campaign pages. For a production theme you'll maintain past this quarter, plan on a custom build.
How long does a Figma-to-Shopify conversion take?
Ranges I've shipped: a 5-section landing page runs 2 to 3 weeks. A full custom theme with 10 to 15 sections and 4 to 6 templates runs 4 to 8 weeks. A design-heavy B2B build like Javson Sports (custom theme plus a wholesale portal on top) runs 8 to 12 weeks. The Figma file's condition changes those numbers by up to 30% in either direction, which is why the handoff audit matters.
How much does a Figma-to-Shopify custom theme cost?
For a founder-scale project (5-8 sections, 3-4 templates, standard Shopify features): $4K to $10K. For a mid-market custom theme (10-15 sections, product page with metafields and variant logic, custom cart drawer): $10K to $25K. For B2B, headless, or Plus-tier work: $25K and up depending on scope. Plugin-based landing pages sit well below this at $500 to $2K, with the tradeoff described above.
What's the difference between a Figma-to-Shopify plugin and a developer build?
A plugin flattens the design into HTML and CSS. A developer builds a Shopify theme: sections with schema, blocks the merchant can add or reorder, snippets for reusable components, dynamic Liquid loops tied to real products and collections, and a build pipeline that keeps assets small. The plugin output looks right until the merchant tries to edit anything. The developer build stays editable and performant for years.
Do I need to hire a designer AND a Shopify developer?
If you already have a Figma file that clears the ten-item handoff checklist earlier in this article, no, one Shopify developer is enough. If the file is a rough draft or a template modification, you'll want both. Skipping the designer and asking the developer to "design in the browser" produces themes that ship on time and get redesigned six months later at twice the original cost.
Can I hit 90+ PageSpeed with a Figma-based custom Shopify theme?
Yes, consistently, if the four performance disciplines are baked in from day one. The Javson Sports Figma-to-Shopify build hit 92 mobile PageSpeed at launch. The win came from lazy-loading everything below the fold, inlining critical CSS, serving WebP with responsive srcset, and setting font-display: swap on every custom font. Bolt-on optimization after launch never gets you there. It has to be in the scaffold.
What Figma features should I use for the smoothest Shopify handoff?
Auto-layout on every repeatable component, published styles for color, type, and spacing tokens, variants for stateful components (hover, disabled, loading), constraints on responsive elements, and Dev Mode turned on so the developer can inspect measurements and export assets without an editor seat. Prototype connections are useful for interaction specs but not a substitute for written behavior notes.
Can I edit my Shopify theme after the Figma-to-Shopify build is done?
Yes, if the developer built it correctly. Every editorial section should appear in the Shopify theme editor with settings for text, images, links, and layout options the merchant needs. Blocks should be addable, sortable, and removable. If your finished theme has hardcoded copy, hardcoded images, or sections you cannot reorder, that is a scaffolding failure, not a Shopify limitation. Ask about editability during scoping, not after launch.
About the author
Abdul Razzaq is a Shopify developer based in Lahore, Pakistan. He's shipped 50+ stores including the Javson Sports Figma to Shopify build with a full B2B wholesale portal, plus custom theme work across DTC and wholesale brands in North America, Europe, and Australia. 7+ years in the Shopify trenches, 5★ across 30+ reviews on Fiverr and Upwork. He leads Shopify development at QWERTY Experts and takes select freelance projects. More writing on the devabdulrazzaq blog.


